How to Make an Interactive Table of Contents in Powerpoint TUTORIAL
How to Make an Interactive Table of Contents in Powerpoint
How to Make a Table of Contents in PowerPoint

It is known that using Microsoft Word can automatically create a table of contents. All y'all need is to head to the "References" tab and click a button for "Tabular array of Contents", later it volition be finished. It is one of the near niggling things in Microsoft Give-and-take. On the other hand, PowerPoint doesn't give you the selection for automated cosmos of tables. There is, nonetheless, a workaround for a PowerPoint table of contents. There are a couple of ways to insert a table of contents in PowerPoint. Permit's check them out.
How to Make a Table of Contents in PowerPoint
There are four methods to create a table of contents and each of the ways for creating a table of contents in PowerPoint has its benefits. Some are easier to make, while some expect more streamlined. Here are the guides for each of them.
• Method one. Dragging Slides to Create a Tabular array of Contents
Dragging slides is the easiest way to create table of contents. All you lot need is to drag and drop. Then the linking and images are done for you.
- Stride one. Create a new slide to be your "Table of Contents".
- Pace 2. Scroll the "Thumbnails Pane" on the left and find the slide you want to add.
- Stride three. Elevate and drop the slide to the original tabular array of contents slide.
• Method 2. Add a Table of Contents
The second way is a flake more complicated, but it allows you to alter the title.
- Step 1. Add a tabular array of contents at the outset of the presentation.
- Step ii. Type the title of each slide in the presentation.
- Pace 3. You can too go to each slide to copy the title and paste it on the tabular array of contents summary slidee.
• Method 3. Using Outline View to Create a Table of Contents
You tin can also try using Outline View. This is one of the fastest ways to insert a table of contents in PowerPoint.
- Step i. Go to the "View" tab, and turn on "Outline View".
- Step 2. You lot will see a list of slide titles in the thumbnails pane on the left.
- Step iii. Copy and paste to add titles to the original table of contents slide.
• Method 4. Create a Table of Contents past Slide Zoom
Last but not least, the new Slide Zoom feature, the latest characteristic in PowerPoint 2019 and PowerPoint for Office 365, can be used to create your table of contents.
- Step 1. Click on "Zoom" on the "Insert" tab, and select "Slide Zoom".
- Stride ii. PowerPoint will brandish the "Slide Zoom" dialog box.
- Pace three. Select the slides you desire to use, and click "Insert".
PowerPoint will use thumbnail images to correspond slides. You lot can change any thumbnail with another epitome. Select your unabridged "Zoom". This will activate the "Zoom Tools Format" tab. Click on "Change Image" and change the image y'all want.
The Best PDF Software
PowerPoint is a versatile software for presentations, just it also has its limitations. As you can see, creating a PowerPoint table of contents is a complicated task. The good news is you lot can catechumen PowerPoint presentations into PDF files, and increment the versatility. So in order to achieve this procedure, you also demand a bully PDF editor, i.e. Wondershare PDFelement - PDF Editor. Information technology is very popular with the palette of features. The following are the powerful features:
- Create PDF documents from scanned images or other files.
- Convert files to PDF, or catechumen PDF to other file formats, including Microsoft Function, HTML, Epub, RTF, and more than.
- Create interactive form fields automatically with one click.
- Extract data from form fields inside the certificate.
- Comment documents by calculation comments, text markups, drawings, stamps, and even attachments equally comments.
- Perform spell check to see if there are whatever errors in your document.
- Protect PDF documents with password encryption.
- Add digital signature to serve as a traditional handwritten signature.
How to Add together and Edit Class Fields or Excerpt Data in PDF
Step 1. Open the PDF File
Launch PDFelement and open the file where you want to add grade fields.

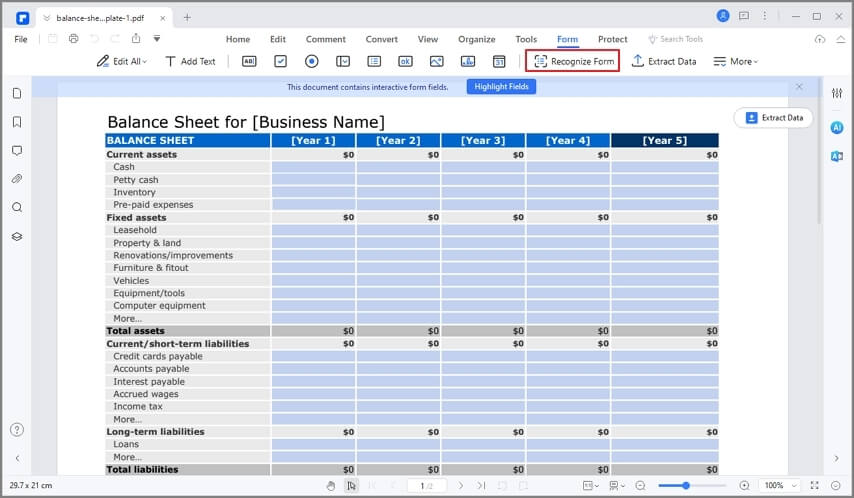
Step 2. Add together Forms in PDF
Go to "Forms", and click on "Grade Recognition". PDFelement will recognize blanks and tables automatically and create fillable fields. The type of class fields will exist automatically named according to the text nearly the form fields.
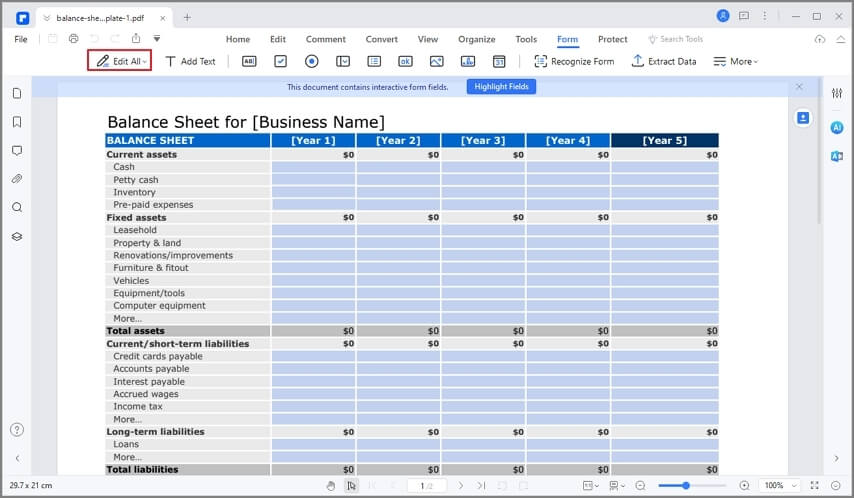
Step 3. Edit the Forms
At this point, PDFelement will automatically besides open the "Course Editing" feature. You tin can motility the forms from 1 point to another inside the document. When yous wish to fill up them, click on "Close Form Editing".
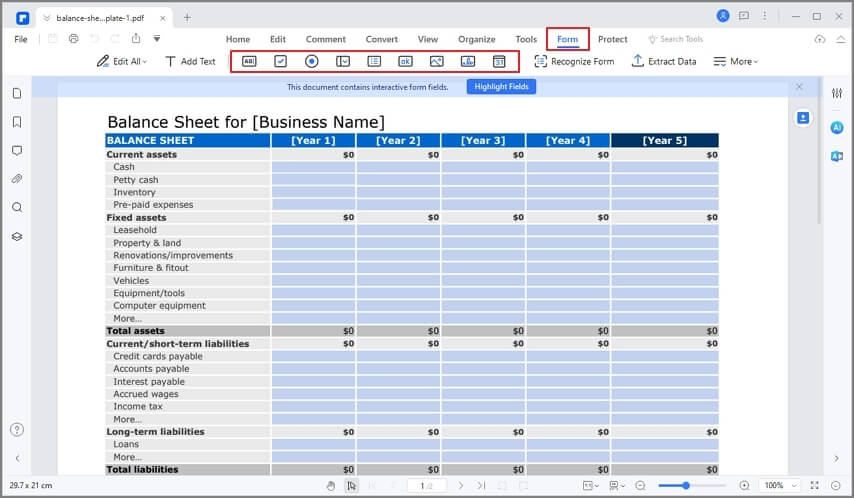
Step 4. Add and Edit the Forms (optional)
You can also manually create course fields. Become to Form, and click on "Add together text field". Select the location where yous want to add the fillable form. You can also select the "Add bank check box" or "Add radio button" option. Finally, you can click on "Close Form Editing" and type directly in the grade field.
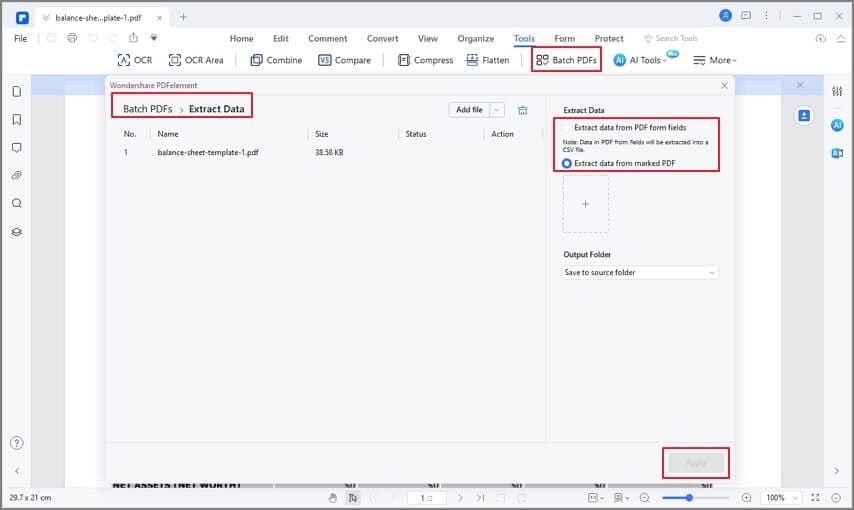
Stride 5. Extract Data
To extract data, go to "Form", and click on "Data extraction" button. If you do not accept OCR installed, the software will ask yous to download and install OCR first. If you accept OCR, click "Next", and so the software will excerpt data.
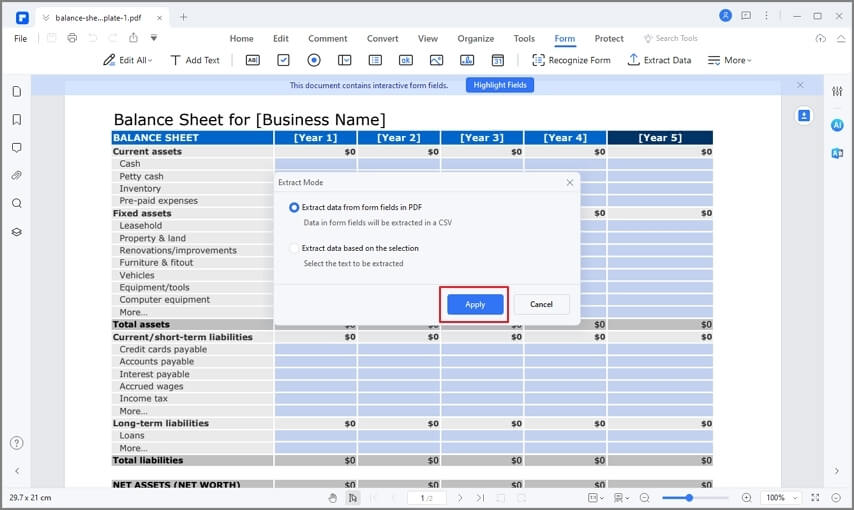
You can also go to the "Batch Process" window, and load more PDF forms. Click "Outset" and PDFelement will extract all the fields including the data in the fields as one *.csv file.
Gratuitous Download or Buy PDFelement right now!
Costless Download or Purchase PDFelement right at present!
Buy PDFelement right now!
Buy PDFelement correct now!
Other Popular Articles From Wondershare
DOWNLOAD HERE
How to Make an Interactive Table of Contents in Powerpoint TUTORIAL
Posted by: judithparying.blogspot.com


Comments
Post a Comment